How to Apply Tint to Car Window: A Step-by-Step Beginner’s Guide

How to apply tint to car window is an easy and affordable way to improve aesthetics, comfort, and safety. To get more privacy and keep your interior safe from UV rays, installing a high-quality window film is an excellent option.
Begin by assembling your tools, which should include a squeegee, utility knife, and a spray bottle filled with soapy water. Make sure windows are extremely clean to promote the best adherence.
Trim the film to fit and then apply it, working from one end to the other and pushing bubbles out toward the edges. Stick to these guidelines, and you’ll get a pro-quality appearance without calling in the pros.
In this guide, I’ll take you step by step through each process to help you complete a successful tinting project — perfect for anyone wanting to learn how to put car window tint on themselves.
Benefits of Tinting Car Windows
Besides the increased beauty of your vehicle, learning how to apply tint to car window provides a number of useful benefits. Let’s take a deeper look at how these benefits can make for a more enjoyable ride.
1. Enhances Privacy and Security
Tinted windows deter potential thieves by making it difficult to see what’s inside your vehicle. This prevents them from easily spotting valuables, making break-ins less likely.
While parked in public places, you’ll enjoy the peace of mind knowing your valuables are hidden from view. The feeling of privacy while driving can also provide a welcome escape from the pressures of busy environments.
By learning how to apply tint to car window correctly, you create a safer, more secure environment for passengers, improving the quality of every trip. For those interested in a DIY approach, knowing how to tint a car window yourself can help you achieve professional results at home.
2. Reduces Heat and UV Exposure
Car window tint protects you from ultraviolet and infrared light. When installed on your vehicle, it can block up to 99% of those harmful UV rays, greatly reducing the chances of skin cancer.
It also prevents up to 97% of heat-producing infrared rays, helping to reduce the heat inside your car. This increases comfort while driving and lessens the need for air conditioning, improving fuel economy.
Tinting your windows protects upholstery and dashboard materials from sun damage, preserving your car’s interior and value. This simple upgrade significantly enhances your comfort during the summer sun.
Learning how to apply tint to car window yourself is an effective way to achieve these benefits without costly professional help. For a DIY approach, knowing how to tint car windows at home makes the process accessible and rewarding.
3. Improves Aesthetic Appeal
Finding the best tint can really bring your vehicle’s aesthetic to the next level. Whether you prefer subtlety or a bold look, with hundreds of shades to choose from, you can find a perfect fit. And when you know how to apply tint to car window properly, you can achieve that sleek, professional finish yourself.
Could you picture your vehicle looking meaner and more elegant with tinted windows? This professional touch can add a high-end feel and boost the overall value of your vehicle, ensuring it stands out wherever you roam.
If you’re wondering how to put car window tint on, following the right steps will help you get the job done cleanly and efficiently.
4. Protects Interior Materials
Tinting is absolutely necessary if you want to protect your vehicle’s interior. It protects upholstery from sun damage and keeps dashboard materials from cracking. Learning how to apply tint to car window correctly helps you shield your interior without paying a premium for professional installation.
Prevent harmful UV rays from wearing down your interior and electronics, saving you thousands on replacements. If you’re interested in how to tint a car window yourself, this knowledge lets you maintain your leather seats and dashboard so they look new for years to come.
5. Increases Comfort for Passengers
Installation of tinting is valuable for reducing glare from the sun and improving visibility for all passengers. A cooler cabin temperature increases comfort on hot summer drives, while giving you more control over your vehicle’s climate.
By understanding how to apply tint to car window, you can achieve these benefits yourself without professional help. For those wanting a DIY approach, learning how to tint car windows at home makes the process accessible and straightforward.
This makes the interior more comfortable on longer journeys or in everyday commutes, enriching every drive.
Essential Tools and Materials
Before you go starting the process of applying window tint to your ride, it’s important to have the proper tools and materials. Being well-prepared with all tools and materials makes your job easier and ensures that everything will go smoothly.
Each tool has its place and purpose, making sure that you’ll be equipped to put almost any project across the finish line, especially when learning how to apply tint to car window effectively.
1. Required Tools for Tinting
First, a utility knife or precision cutting blade is required to trim the tint film precisely. With this tool, you can cut clean edges and create exact measurements. Prepare to apply the film.
Grab a squeegee or a hard-edged card to smooth out the film while applying it. This is the key to avoiding bubbles and wrinkles. A spray bottle filled with soapy water, accompanied by a squeegee, is crucial for application, giving you the flexibility to adjust the film as you lay it down.
If you’re learning how to apply tint to car window properly, be prepared with a clean cloth to absorb any excess moisture. Use a microfiber cloth to ensure the surface is clean and clear of dust or debris before applying the tint, which could affect adhesion.
Finally, it’s just nice to have a heat gun or hairdryer available when working with the film, as it’s useful to shrink around curves and edges. Knowing how to put car window tint on with the right tools will help ensure a smooth, professional-looking result.
2. Types of Tint Films Available
When selecting your tint film, you can choose from several types: dyed, metalized, hybrid, carbon, and ceramic. Each of these types has its strengths. Dyed films provide some privacy, a good reduction of heat and glare, along with a more subtle look. Ceramic films offer high UV protection levels while not disrupting electronic signals.
Understanding the strengths and weaknesses of each variety allows you to pinpoint a tint that meets your criteria while staying within your budget.Whatever the case may be, you should always know your local regulations before you select a window tint. For instance, Arkansas allows as low as a 10% tint on rear windows.
Knowing the rules ensures you’re fully prepared when learning how to apply tint to car window properly and legally. And if you’re wondering how to tint a car window yourself, selecting the right film is the first step toward achieving a clean, compliant, and long-lasting result.
3. Additional Supplies Needed
Beyond the main tools, amass materials such as soapy water for cleaning and applying tint to your windows. A single-edge razor blade is handy for trimming excess film during installation.
Always have adhesive removers on hand for post-installation cleanup. Lint-free cloths are essential for the final window cleaning touches, giving you a guaranteed streak-free shine.
Duct tape helps keep the tint tight while it’s applied and waiting. Sponges help make cleaning surfaces simple. These materials become especially helpful when you’re learning how to apply tint to car window efficiently and with professional-level precision.
If you’re figuring out how to tint car windows at home, having these tools and supplies ready can make the job smoother and more manageable. Make sure to leave enough extra film to trim 2–3 inches to fold under.
Preparing for Tint Application
While creating the tint application should be a final step, having a clean, tidy, and organized workspace to prepare is very important. Pick a location that is clean, dust, and debris-free to avoid the risk of contamination during prep and application.
Preventive maintenance is key when learning how to apply tint to car window properly. It’s extremely important to keep the temperature no higher than 75°F and no lower than 65°F.
This small range allows the adhesive to make a consistent bond to the glass substrate. Before cleaning, make sure to take down any stickers, decals, or other obstructions on the windows, as these can affect tint adhesion.
If you’re exploring how to put car window tint on in your own garage or driveway, creating a clean, temperature-controlled environment is one of the most important steps for achieving a professional result.
1. Clean the Window Surface Thoroughly
Start with the window pane washed down with a soapy water solution. This step cleans away any dust, dirt, grime, and other residues that can compromise the tint’s ability to bond properly. Understanding the science behind how to apply tint to car window shows that a clean surface is essential for a strong adhesive connection.
After washing, dry the window with a lint-free cloth, taking care not to leave any fibers on the glass. Make sure to take time to inspect the surface for any imperfections that could affect the tint process.
Most importantly, it’s crucial to allow the window to fully dry before moving forward. These careful preparations are key when learning how to tint car windows at home for a flawless installation.
2. Measure the Window Dimensions
Taking the right measurements is essential to a successful tinting project. When learning how to apply tint to car window, start by using a measuring tape to record the exact size of each window so you can apply the tint properly. Pay close attention to all curves and irregular shapes.
Trim the tint film slightly larger than your measurements to leave room for tucking and adjustments. A quick double-check of your measurements goes a long way in saving time and preventing mistakes while cutting, ensuring a flawless application.
These steps are also a crucial part of understanding how to put car window tint on effectively and cleanly.
3. Cut the Tint Film to Size
With your dimensions measured and marked, when learning how to apply tint to car window, roll out the tint film over the exterior of the window for an accurate cut. A utility knife will help you create a precise cut in the film, leaving at least an inch of excess for maneuvering.
Clean, straight cuts are very important to avoid any jagged edges. Mark each cut piece for easy identification during installation. Rolling down your window prior to application will give you a much more comfortable workspace.
If you’re tackling this project on your own, these tips are essential for mastering how to tint car windows at home with confidence and precision.
Step-by-Step Tint Application Process
Applying tint to your car windows will not only improve the look of your vehicle, but it will boost its functionality. When learning how to apply tint to car window, taking a step-by-step approach is the most important part of making sure you end up with a perfect install. Here’s a step-by-step guide to getting the tint ready and applying it properly.
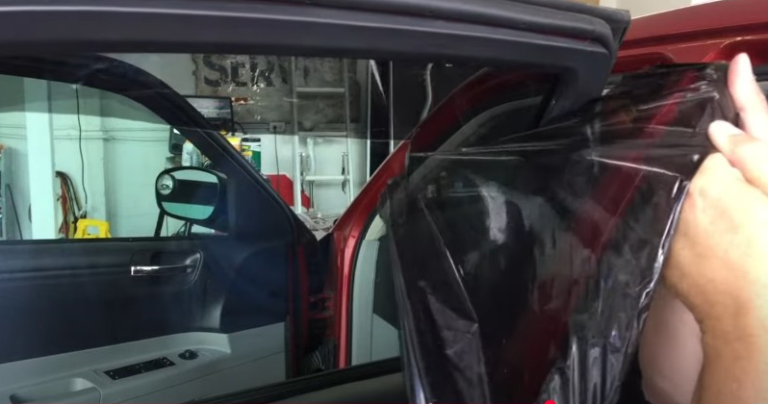
1. Apply the Tint Film to the Window
When learning how to apply tint to car window, begin by spraying the interior of the window with soapy water. This creates a tacky, slippery surface that makes positioning the tint easier. Peel back the adhesive backing on the tint film carefully, holding it by the edges to avoid fingerprints.
Next, place the film on the window with the adhesive side facing the glass. Once positioned, use a squeegee to press the film down, working from the center outwards to push out any air bubbles.
This crucial step ensures the film is securely adhered to the glass for a flawless finish—just one of the key techniques if you’re figuring out how to put car window tint on like a pro.
2. Use Techniques to Avoid Air Bubbles
When learning how to apply tint to car window, it’s important to reduce the risk of air pockets by installing the tint film gradually and evenly. Start pressing down from the middle, pushing any air bubbles out toward the edges with a squeegee. This ensures even pressure and proper adhesion.
If stubborn bubbles remain, gently puncture them with a straight pin to release the trapped air. A helpful tip—especially if you’re figuring out how to tint a car window yourself—is to keep the film wet during application. This allows you to reposition it if needed for a flawless finish.
3. Adjust for Temperature and Humidity Conditions
Before you start how to apply tint to car window, pay close attention to environmental factors. Tinting in very hot or humid conditions can complicate the process, making it harder for the film to stick properly. If you notice the film isn’t adhering well, use a heat gun to gently warm and reposition it.
Be sure to let the film relax to room temperature before applying heat. Taking weather conditions into account during installation greatly affects the tint’s performance and final appearance. For those learning how to tint car windows at home, understanding these factors can make all the difference in achieving a smooth, long-lasting finish.
Common Mistakes to Avoid
Whether you’re learning how to apply tint to car window or adding a window film to your vehicle, there are a few common mistakes to avoid. Many of these errors are preventable, and being aware of them will help you achieve a much better, professional-looking result.
1. Rushing the Installation Process
If this is your first time learning how to apply tint to car window, taking your time during installation is critical. Every step—from measuring to cutting the tint—needs to be precise and efficient. When you feel tired, rest your eyes.
Rushing can cause misalignments or bubbles, which ruin the final look. Slow down, focus on the details, and be patient. The extra care upfront means your tint will last longer and look sharper.
For those wondering how to tint car windows at home, patience and attention to detail are your best allies for a professional finish.
2. Neglecting Surface Preparation
When learning how to apply tint to car window, don’t underestimate the importance of surface preparation. Start by thoroughly cleaning the window to remove dust, grease, or water marks. Any dirt, wax, or contaminants can cause the tint to peel or bubble over time.
Inspect the glass for scratches or defects before applying the tint. A clean, smooth surface ensures better adhesion and results. Make sure all your tools and materials are ready ahead of time to keep the process efficient and effective.
If you’re planning how to tint car windows at home, proper preparation is key to achieving professional-quality results.
3. Ignoring Local Tinting Regulations
When learning how to apply tint to car window, it’s crucial to understand local tinting regulations, which can be complex and vary by state. Make sure to check your local and state laws regarding Visible Light Transmission (VLT) percentages.
Knowing which types of windows are legally allowed to be tinted helps you avoid fines or legal issues. Being proactive about compliance will save you from future headaches. If you’re unsure, local authorities can clarify any questions you may have.
If you’re figuring out how to put car window tint on, always keep these regulations in mind to ensure a smooth, legal installation process.
Best Practices for Long-lasting Tint
When learning how to apply tint to car window, it’s important to also follow expert maintenance tips to keep your tint durable for years. Adhering to smart care practices helps extend the life of your tint, preserving both the look and function of your vehicle.
1. Maintenance Routines Post-Installation
When learning how to apply tint to car window, proper care after installation is just as important. To best care for your tinted car windows, begin by cleaning them regularly with a simple soap-and-water solution and a microfiber cloth. This easy step greatly reduces the chances of scratching the film while keeping it clear.
Avoid ammonia-based cleaners, as they can break down the tint over time. Setting up a maintenance plan helps catch issues like bubbling or peeling early, preventing further damage.
Protecting your car’s interior from dust and debris also extends the life of the tint. Additionally, try to avoid exposing your car windows to extreme temperature swings and harsh sunlight, which can stress the film over time. If you’re looking for how to tint a car window yourself, following these care tips after application is essential.
2. Tips for Keeping Tint in Optimal Condition
After learning how to apply tint to car window, it’s important to follow some key care tips to maintain the film. Once installed, avoid rolling your car windows down for at least 48 hours so the adhesive can properly set.
For daily cleaning, gently wipe the tint with a soft microfiber cloth to prevent scratches—never use sharp objects like keys or tools on the tinted surface.
Regularly inspect your car’s tint for any damage, addressing small issues early to prevent them from worsening. Whenever possible, park your car in a garage or covered area to shield the tint from extreme weather and prolong its life.
If you’re wondering how to tint a car window yourself, proper care after installation is just as important as the application process.
3. Signs Your Tint Needs Replacement
After learning how to apply tint to car window, it’s crucial to watch for warning signs that your car’s tint needs replacing. Bubbling or peeling edges signal adhesive failure, while discoloration or fading leads to uneven color and blurry visibility.
If you notice reduced clarity or scratches, it’s time to remove and replace the tint. Also, when UV protection diminishes, a fresh tint is essential.
For those wondering how to tint car windows at home, don’t compromise your car’s safety and style—upgrade your tint for optimal protection and a sleek look.
Conclusion
Installing window tint is one of the best ways to upgrade your everyday car. Knowing how to apply tint to car window and how to put car window tint on makes this project achievable for anyone. With the right tools, knowledge, and technique, you can tackle the installation yourself—just be sure to read instructions carefully and avoid common pitfalls.
Remember to maintain your tint properly once applied to prevent damage and ensure its longevity and appearance. This simple upgrade not only boosts comfort by lowering interior temperatures but also protects your valuable interior from sun damage.
Ready to improve your ride? Gather your materials, follow the application steps we outlined, and enjoy all the benefits of tinted windows. You’ll be amazed at how much better your driving experience becomes!
Frequently Asked Questions
How do they put tint on car windows?
Car window tint is installed with an adhesive film specifically designed for this purpose. Professionals start off by making sure the glass is as clean as can be. They finally trim the film to fit and perfectly adhere it to the window, pushing out any bubbles for a seamless look.
How do you stick tint to a car window?
Window tint is a film that attaches using a pressure-sensitive adhesive. Step 1: Apply Window Film First, spray down your window with a soapy mixture. After that, lay the tint into place, and utilize a squeegee to remove air bubbles and properly adhere the film.
Can I use soapy water to apply tint?
Yep, this is soap and water – or more-so, soapy water. This gives you greater flexibility to position and adjust the film until it’s ready to adhere permanently to the glass.
How do you apply black tint?
Cut the tint film to fit the car window. Afterward, clean the glass, spray it with a soapy solution and slowly apply the film while avoiding bubbles. Use a squeegee to ensure a smooth application and remove any bubbles that may form.
How is factory tint applied?
Factory tint typically refers to tint that’s applied during the manufacturing process. For an opaque, more permanent finish, you can dye the glass. Second, you can apply some kind of window tint or film directly to the windows.